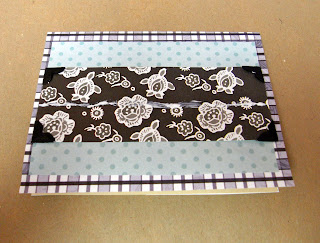
Hey everyone! Today's post is not fashion or style related, but it's another one of my favourite things. I am a complete art project nerd. I love making crafts :) Here is my fool-proof recipe for making amazing cards for birthdays, holidays and more. Better yet, you can find all of the materials at the dollar store. Here's what you'll need:
- 1 piece of card-stock or heavyweight paper
- 3 pieces of decorative paper
- 4 decorative corners
- 1 piece of ribbon (about 30cm)
- embellishments like sequins, beads, appliques, etc.
- scissors
- glue (white glue or glue stick)Step 1: Cut a base out of card-stock
Use a neutral-coloured heavy paper to create the base for your card. Decide if you want your card to open vertically or horizontally. Choose a couple of pieces of decorative papers from the package for your colour palette.
Step 2: Set the border colour
Choose a paper for the border. This will also be the colour on the back of your card.We'll call this paper #1 to help keep things straight. Open the cardstock so that it lays flat. Cover the back of the card-stock with glue and then lay it onto the reverse side of paper #1.
Step 3: Add your background colour
Cut a slightly smaller square out of paper #2 and glue it onto paper #1. Make sure that the corners are glued down tightly.
Step 4: Add the stripe
Cut a thin strip out of paper #3. Trim it so that the edges sit flush with the inside square (paper #2). Add four decorative corners. They come in sticky and non-sticky versions - if they aren't sticky, then add a dab of glue to hold them in place. Once that's done, glue it onto the card.
Step 5: Add the ribbon
Lay down a thin line of glue along the middle of paper #3. Cut a piece of ribbon, lay it on top of the glue and then press it down. Trim the edges to fit and run a tiny bit of glue over the rough edges to stop them from fraying.
Tie a little bow with the remaining ribbon. Stick it onto the middle of the card and seal the rough edges of the ribbon with glue.
Step 6: Add embellishments
I found these little stars at the dollar store in a package with other shiny shapes. Make sure that you don't have any glue on your fingers when you pick them up, otherwise it'll make them dull. Put three little blobs of glue onto the card and then drop the stars onto them. Press them down and let it all dry.
ALL DONE!
Fill out your card and give it to your loved one :) Remember to mix it up and play with formats, colours, textures and more! Here are some of the other cards I've made.
Talk soon,
Vi


No comments:
Post a Comment